Before I start I would like to insist on how GREAT an improvement this shroud has made in cooling my engine!
Before building this shroud I had the 2 fans mounted directly to the radiator and I would regularly read 195-200 degrees F on my electronic stepping-motor water temperature gauge. This was in summer after about 20 minutes of driving.
After installing my new shroud with the method described below, I am seeing a drop in water temperatures of 15-20 degrees. After driving for 20 minutes in summer heat, the needle would be around 180 and it has NEVER gone past 184 deg. F.
If you need more details on how to work with fiberglass, please search google for "building speaker enclosures from fiberglass". The methods are similar.
For this project, you'll need:
- MDF board from your local Home depot, Rona, Reno Depot, etc.
- Around 1 foot of 2x4;
- Fleece or some sort of relatively stretchy material, I used an old cotton kitchen table for lack of other material;
- A good stapler that can staple through the MDF;
- A few wood screws;
- In my case 8 machine screws with nuts to attach the fans to the shroud;
- A roll of that foam tape used to weatherproof truck caps;
- An impact driver to make the job easier;
- Fiberglass mat ($$$) or fiberglass strands (less expensive) or both (I used the mat);
- Fiberglass resin and activator;
- A few brushes from the dollar store (so you can throw them away after);
- A few plastic cups;
- Body filler;
- 150 and 220 grit sand paper;
- Primer filler;
- Your choice of paint.
Ok great, so first thing you need to do is start taking measurements:
- Measure the radiator core (whatever has fins or bars on it, not the end tanks), and write down your measurement. You need length and width and then add 1/2 inch to each of these measures to compensate for what material you will lose when removing shroud from the base.
- Then measure your fan diameter and add 1 inch to this measurement (this is to be able to mount the fans to this rim).
- Also measure how much room there is in the engine bay between the radiator and the engine. Subtract the thickness of your fans from this and then another 4-5 inches to allow room to work on the engine.
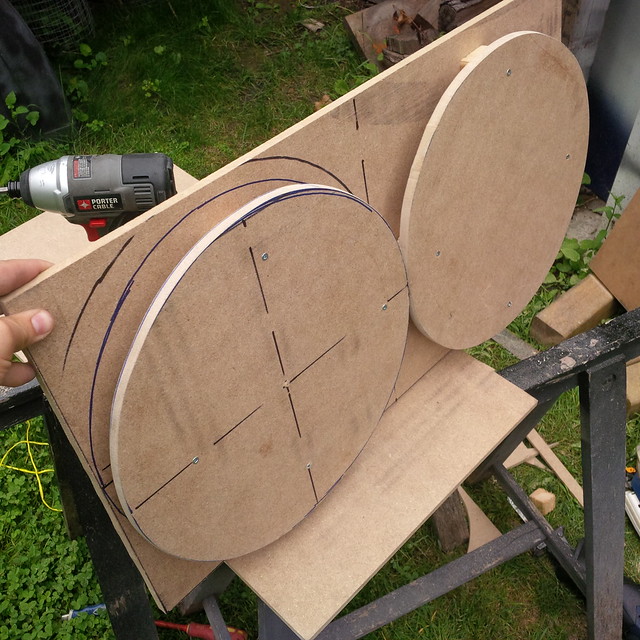
Now take the MDF board and mark your radiator core dimensions on it. Measure twice to make sure it's right. Cut it using a jig saw or hand saw. Go slow and cut straight!
Measure and mark the middle on this piece for both length and width. Trace lines to be able to align your fan rings properly.
Take some more MDF and measure two squares on it that each have the length equal to the diameter of your fans + 1 inch. In my case these were 12x12" squares.
Measure and mark the middle of each square as well as guide lines. Then set a screw in the middle. Attach one end of a string to your Sharpie and the other to the screw. You now hold the sharpie 90 degrees to the surface and draw a 1/4 of the circle at a time by simply attaching your guide lines.
Proceed to cut these circles out of the MDF board.

(measurements here are: rectangle 26x14"; circles: 13" diameter; total thickness: 2")
Now take the 2x4 and cut small blocks of wood that will serve to space out the mdf circles from the base rectangle. (This is a good time to double check how thick you can make the shroud without hitting the engine components. My fans were Mishimoto and they are around 2 1/4" thick, so I decided another 2" for the shroud would be perfect.)
You will now proceed to screw the spacers onto the base rectangle and then the rings to these spacers. Make sure to put these spacers as much close to the center of each circle as possible, this will allow you to remove them easily later.
Next step is stretching the material over your template. Go ahead and cut a piece of material larger than the base and start stapling it from the middle towards the corners. Stretching the fabric as much as possible to avoid sagging when laying fiberglass.
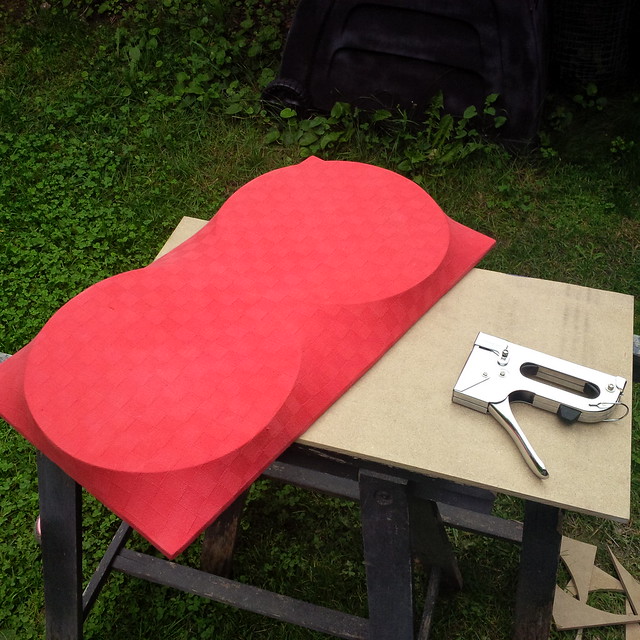
You should now cut another piece of the MDF board a little bigger than the rectangle used as the base. This is only used as a table and makes it easier to cut out your finished product from the mold.
(not 100% necessary)
You are now ready to start mixing and laying fiberglass resin over the stretched material.
Start by cutting your fiberglass mat or strand mat to fit over your template. I only used 1 layer on mine.
Read and follow the instructions that came with your resin.
Apply an even coat over the fabric with a brush. Then lay the fiberglass mat over the fresh resin. Using the same brush apply more resin over the mat and make sure no air pockets remain. Use a roller or just the brush to get rid of these pockets.
Let the piece sit overnight and get back to it tomorrow.
Sorry I didn't take photos of these steps, you can look for info on working with fiberglass on google.
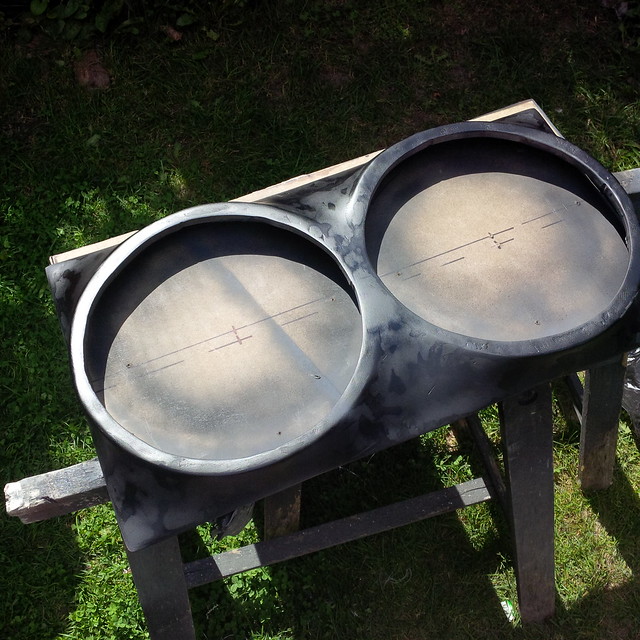
After it's dry you can start cutting along the base of the piece with a die grinder, an air saw or as I did, a cut-off wheel (works very well btw). Now remove the screws that hold the spacers from the backside. This will let you separate the shroud from the rectangle base.

As you can see from the photo, the next step is to cut out the middles of the mdf disks while leaving a 1" rim to mount the fans. Measure and mark the center of the disks and trace diameter lines that cross each other at 90 degrees. Now subtract 1/2 inch from every end of these guide lines and using the same method described above, draw an inner circle that will be 1" smaller in diameter than the outer circle.
Drill holes in each 1/4 section of the disks to be able to fit a jig saw blade in there and cut out the inner circle leaving behind a nice mdf ring that will allow you to mount your fans securely.
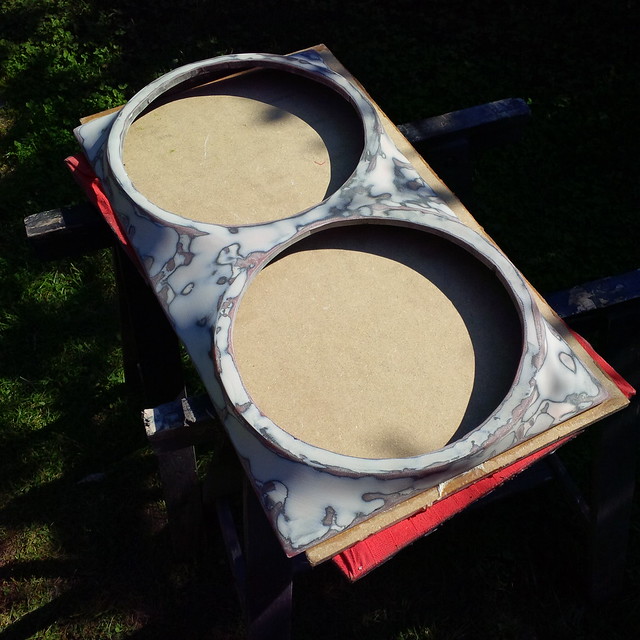
Time to finish your shroud off by sanding it with 150 to allow proper bonding with some body filler.
Mix up some body filler and apply a thin coat all over the piece. Allow to dry and sand it down with 150 on a flexible block. Spray a coat of dark coloured primer before sanding to be able to see the low spots.
Now add as many coats of body filler as needed to make the piece smooth and perfect. (or until you're satisfied). I ended up using around 3 coats. And A LOT of sanding.

(final coat of filler)
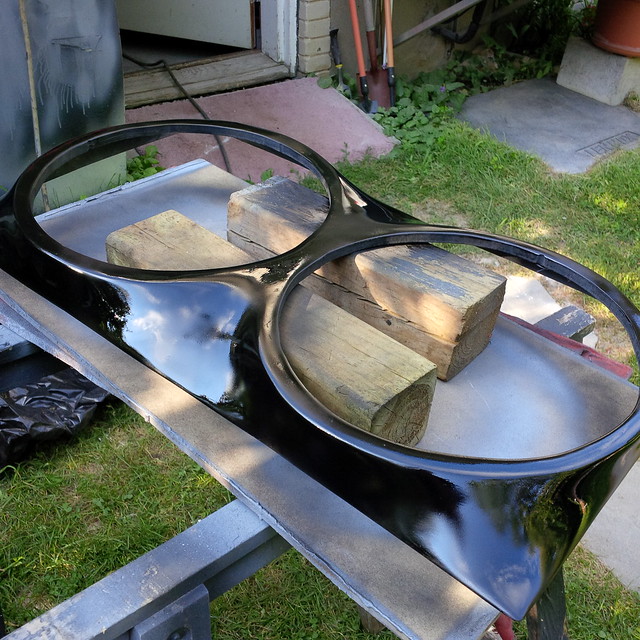
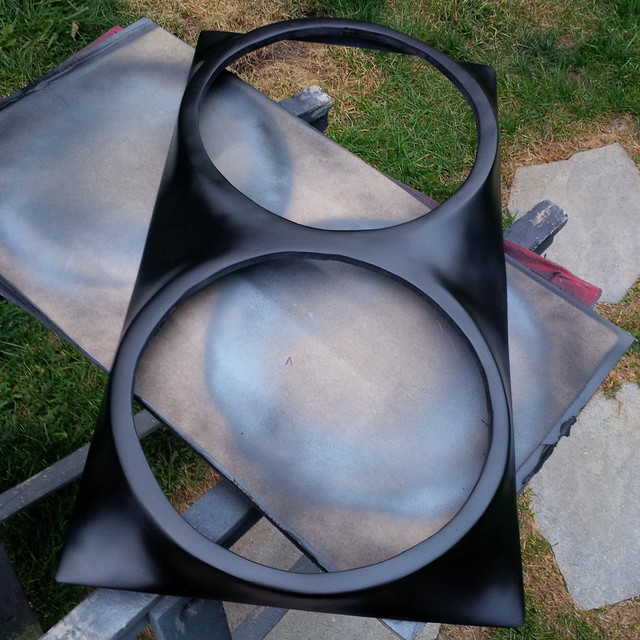
Put down two nice coats of primer filler and end up with something as smooth as this:

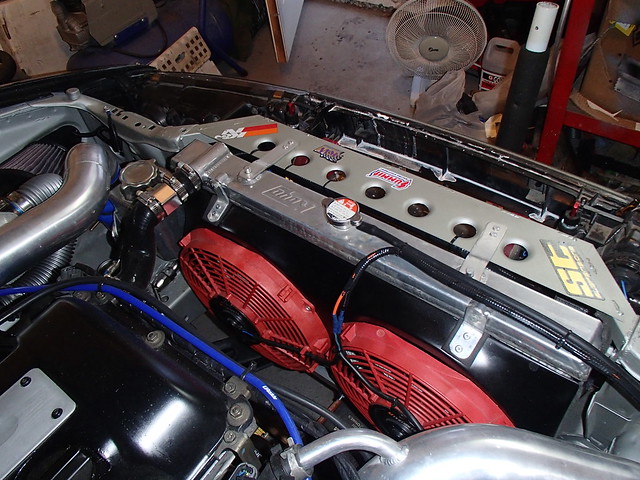
Now you can paint it the color you want. Mine is satin black although it was wet in this photo:
Now you can place your electric fans over the shroud and mark the location for where the mounting holes will be. Drill the holes through the MDF and use screws + nuts to attach.

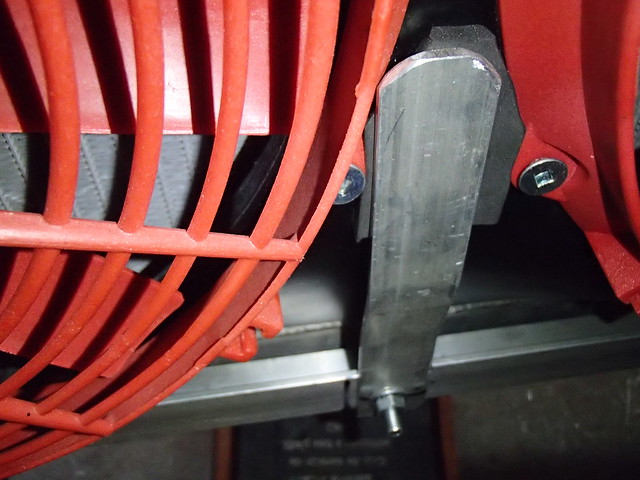
Next up is the mounting tabs that will hold the shroud to the fan. Make these according to your radiator, mine had two threaded holes (M10x1.0) so I just used some aluminum bar to make these tabs. Used rivets to mount them to the fiberglass, also notice the foam tape under them to eliminate rattling.
Use this same foam and stick it along the edges of the radiator core, where the shroud will make contact, to increase efficiency and reduce vibration.
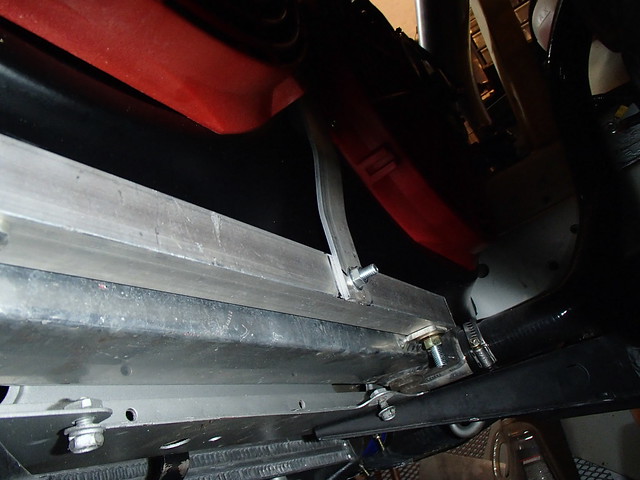
Bolt it up to the radiator and find a way to attach the lower side of the shroud to the radiator. I made a mount from aluminum. There is no definite solution to this, just ingenuity. I'll go take photos of the mount I made. Mine bolts to the lower tabs that came on the radiator using an angular piece of aluminum bar and another flat bar that comes from the middle of this and is angled to push the fan shroud close to the radiator. Also notice the same foam tape to avoid rattling.
Enjoy your new shroud setup and post if you were able to make one and how much did your temps drop! Thanks!
No comments:
Post a Comment